

Pancake mix is a Jack of all trades, and it works extremely well in so many recipes. You can use it in muffins, cookies, cakes, sweetbreads, and various other goodies. You’d get an extra layer of flavor and a richer texture
Pancake mix is also a lifesaver if you don’t have enough flour in your pantry, but really want to bake a tasty loaf of banana bread. The good news is that you can still go ahead with your baking without running off to the supermarket.
Here’s how to make banana bread with pancake mix. This recipe is the ultimate crowd-pleaser!
Make The Best Banana Bread With Pancake Mix
Using pancake mix makes your banana bread even more delicious, and it cuts down the prep time nicely. Especially if you use the complete pancake mix, which requires only water to be ready.
Let’s get to it!
Step 1: Round Up What You’ll Need
The basic recipe has few ingredients, which is great news if you’re in a hurry.
Here’s what you need, if you have the complete pancake mix:
- 2 cups Pancake Mix
- 1 tsp Vanilla Extract
- 3 Bananas, over-ripened
- ¾ cups Water
If your pancake mix is regular, not complete, then add these ingredients:
- 2 medium-sized eggs
- 1 stick of soft butter
- ¼ cup sugar (brown or regular)
- ½ tsp baking soda
- Pinch of salt
You would also need a baking pan for the banana bread, parchment paper, spray oil for preparing the pan, and a serving dish.
To glam up the cake, you can add one or more of the following:
- Chocolate chips
- Nutella
- Mixed nuts
- Dried fruits
- Shredded coconut
- Extra spices like cinnamon, ginger, or ground cloves
- Sugar icing
- Caramel sauce
Step 2: Prepare the Dry Ingredients
In a medium-sized bowl, put the pancake mix. Whether you’re using a complete or regular mix you’d need to add a bit more sugar.
For the complete mix, a couple of tablespoons should be sufficient.
For the regular mix, ¾ of a cup would give you the perfect amount of sweetness
The amount of baking powder in the pancake mix is usually sufficient for making pancakes, but it hardly works for heavy bread.
Banana bread needs a stronger leavening agent, so you should add a bit more baking soda. Add a pinch of salt to the mix for best results.
Step 3: Prepare the Wet Ingredients
In another bowl, mash the ripe bananas lightly with a fork. You don’t want them to be extra smooth, as a little lumpiness concentrates the flavor in the baked bread.
Add the butter and eggs if you’re using the regular mix and stir them well with the mashed bananas.
Toss in the vanilla, and fold it inside the wet mixture.
Step 4: Glam Up the Mix
Add the dry ingredients to the wet ingredients and stir everything together. You don’t need to overdo this step, as it would develop the gluten too much, and make the bread too rubbery.
You also don’t need to use a food processor or even an electric hand mixer. Light mixing is all that you need.
The dough is now ready for baking, but if you have the time and a few more ingredients, how about glamming things up a bit?
Chocolate chips are perfect with bananas! Then again, walnuts and bananas are a match made in heaven! You can also stir a tablespoon of creamy Nutella into the dough, and move it around a little. That should leave marble-like streaks in the bread.
Feeling bold? How about a dash of cinnamon? Maybe some dried fruits?
If you have an exotic craving, then go for some pecans and shredded coconut. There are so many ways to take your banana bread to the next level.
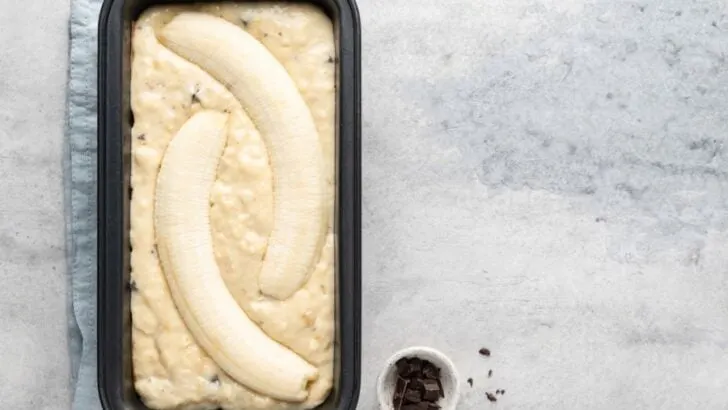
Once you’ve added your favorite ingredients to the banana bread dough, pour it into the baking pan. And don’t forget to add a few more of that food on the top layer.
Step 5: Bake the Banana Bread
The dough, or batter, is now ready for baking. Tap the pan a couple of times on the counter to get rid of excess air, then pop it into a preheated oven. Set the temperature to 350 degrees F.
Banana bread takes about 50-60 min to be fully done. You can tell by the way it rises that it’s a success! To be sure, poke the middle of the loaf with a toothpick. It should come out clean, or with some crumbs clinging to it.
If the toothpick comes up with batter, then you need to leave the bread in the oven for a few more minutes.
Try to keep the crust of the bread golden and crisp. If it starts to become a darker brown, then cover the bread with foil till it’s fully done.
Sometimes the bread caves in the middle, and that’s not a very flattering look. To avoid that, make sure that the oven doesn’t get too hot. Also, don’t overmix the batter, as a gummy dough rarely rises as it should.
Step 6: Serve the Banana Bread
Let the bread rest in the pan for a few minutes, then take it out, and place it on a metal rack.
You can serve the banana bread as it is, or you can add icing on top. There are various options for that, from the simple sugar icing to the more elaborate chocolate ganaches and caramel sauce.
Banana bread is great when it’s hot! You can serve it alone, with some fresh fruits, a scoop of ice cream, or a hot beverage.
Step 7: Store the Leftover Banana Bread for Later
Banana bread stays soft and full of flavor for a few days in the fridge, if it’s properly wrapped. You can also freeze it for months on end, and it would retain all of its goodness.
To keep all the taste and unique texture of banana bread, place a paper napkin around the bread slices or the whole loaf, then wrap it twice with plastic wrap.
Put the wrapped bread inside a suitable container or freezer bag. Label the container, then pop it into the freezer. Banana bread can be stored for 6-8 months, and when you bring it out, it would be as good as new.
To use frozen banana bread, let it thaw overnight in the fridge, then reheat it in the oven or microwave. Alternatively, you can place it on the counter for about three hours.
If you’re in a hurry, you can just use the microwave to defrost and reheat the banana bread. However, a slow defrost would give better results.
Final Thoughts
Banana bread is a great breakfast food, and it’s just as delish as a snack at any time during the day. You can even pack it along with your office lunch as a midday pick-me-up with a side of coffee.
Isn’t it great that you can prepare it in a jiffy using pancake mix!
I have a bachelor’s degree in Film/Video/Media Studies, as well as an associates degree in Communications. I began producing videos and musical recordings nearly 15 years ago. I am a guitarist and bassist in Southwest MI and have been in a few different bands since 2009, and in 2012 I began building custom guitars and basses in my home workshop as well. When I’m home, I love spending time with my three pets (a dog, cat, and snake) and gardening in my backyard.